Oracle SOA, AIA BPEL ESB and OSB knowledge base

Friday, November 6, 2009

SOA BPEL 11G with EJB Service

With Oracle Soa Suite 11G ( FMW11G R1 ) we can finally use the EJB adapter. This adapter can be used as a service or reference. This means we can start a BPEL process by calling a EJB session method or use an EJB to lookup or change data. Using an EJB as service or reference is very cool because it is fast ( RMI ) and we can use the same EJB's ( Multi Tier ) for your Java Web applications and your composites ( Who needs the Database Adapter now?) Here is a picture of the composite application with an EJB adapter as Service and Reference.


In this blog I will explain you first, how the SDO EJB is created and then how we use this as a Reference and as a Service
Create SDO Eclipse EJBFirst step is to create an EJB entity with Eclipselink as persistence provider. For this example I used the Employees table of the HR schema. Next step is to create an EJB Session Bean.Here is an overview of my EJB model project.


Select the Session Bean and generate a service interface on this


Now it goes totally wrong with the JDeveloper wizard 11G R1.


First step is fix the packages names of the SDO and SDOImpl classes, then we can refractor these classes and move it to the entities package. With this as result.


Select the session bean again and generate for the second time the service interface. Now we will get the WSDL.


Move the EJB WSDL and XSD to the Session bean package. With this as result.


Open the Entity XSD and change the target namespace and xmlns namespace to the same name as the package name in my case /nl/whitehorses/hr/ejb/entities/.before


after


Open the XSD of the WSDL and import the entity schema and fix the namespace.


Change /nl.whitehorses.hr.ejb.services/ to /nl/whitehorses/hr/ejb/services/ in every java, XSD or WSDL file
Create a Datasource to the HR schema in Weblogic and make sure you are using the XA Oracle Driver and target this Datasource to the Soa suite server.
Deploy the EJB to the Soa Suite instance.
Using the SDO Ejb as a reference in Soa Suite 11gOpen the composite application and drag the EJB adapter on the reference part of the composite.


Fill in the JNDI of the EJB on soa suite server , select the EJB jar and provide the Remote EJB interface class name. Select the WSDL , Go the classes folder of the EJB model project and select the Session bean WSDL. This will copy the WSDL and the XSD to the local project folders and also import the jar. That's all , now you can invoke this in a BPEL process.


Using the SDO Eclipselink Ejb as a Service in Soa Suite 11gWe can use the same EJB as starting point of our composite application. This time Soa Suite only uses the interface and does nothing with the Session Bean methods. Drag the EJB adapter to the Services side of the composite overview.


The Service ID is very important because we need this name in serviceFactory.createService, The rest is the same as in the reference part. Use this EJB Service in a BPEL process.
Now we only have to make a simple java class where we call this EJB composite service.


package nl.whitehorses.soa.ejb.service;

import commonj.sdo.helper.DataFactory;

import java.util.Properties;

import javax.naming.Context;
import javax.naming.InitialContext;

import nl.whitehorses.hr.ejb.entities.EmployeesSDO;
import nl.whitehorses.hr.ejb.services.HrEmployeeEJB;

import oracle.integration.platform.blocks.sdox.ejb.api.SOAServiceFactory;
import oracle.integration.platform.blocks.sdox.ejb.api.SOAServiceInvokerBean;

import oracle.jbo.common.sdo.SDOHelper;


public class callejb {
public callejb() {
super();
}

public static void main(String[] args) {
try {
// very important to load every schema you use in the EJB
try {
SDOHelper.INSTANCE.defineSchema("nl/whitehorses/hr/ejb/entities/", "EmployeesSDO.xsd");
SDOHelper.INSTANCE.defineSchema("nl/whitehorses/hr/ejb/services/", "HrEmployeeEJBBeanWS.xsd");


} catch (Exception ex) {
ex.printStackTrace();
}

Properties props = new Properties();
props.put(Context.INITIAL_CONTEXT_FACTORY, "weblogic.jndi.WLInitialContextFactory");

// soa suite server
props.put(Context.PROVIDER_URL, "t3://localhost:8001");
InitialContext ctx = new InitialContext(props);
SOAServiceInvokerBean invoker = (SOAServiceInvokerBean)ctx.lookup("SOAServiceInvokerBean#oracle.integration.platform.blocks.sdox.ejb.api.SOAServiceInvokerBean");

//-- Create a SOAServiceFactory instance
SOAServiceFactory serviceFactory = SOAServiceFactory.newInstance(invoker);

// use the Service Id in the EJB service adapter
HrEmployeeEJB hrEmployeeEJB = serviceFactory.createService("EmployeeService", HrEmployeeEJB.class);


EmployeesSDO employeesSDO = ( EmployeesSDO )DataFactory.INSTANCE.create(EmployeesSDO.class);
employeesSDO.setDepartmentId(1L);
employeesSDO.setEmail("aaa@aa.nl");
employeesSDO.setEmployeeId(1L);
employeesSDO.setFirstName("edwin");
employeesSDO.setJobId("aa");
employeesSDO.setLastName("biemond");
employeesSDO.setPhoneNumber("123");
employeesSDO.setSalary(1000);

EmployeesSDO resultEmployeesSDO = hrEmployeeEJB.persistEmployeesSDO(employeesSDO);

} catch (Exception ex) {
ex.printStackTrace();
}
}


}


Here is the result of a EJB service instance.


Here the link to official EJB adapter(http://download.oracle.com/docs/cd/E12839_01/integration.1111/e10224/sca_sdo_ejb.htm) documentation. ( This can be a lot better )
Download here the EJB project(http://www.sbsframes.nl/jdeveloper/AdfEjbHr.zip) I used and here the Soa Suite project (http://www.sbsframes.nl/jdeveloper/SoaEjbReference.zip).
How to make two BPEL process participate in Transaction

- create a BPEL process (regardless sync or async)
- create 2 invokes to 2 distinct DB partnerlinks that perform each one an
insert into 2 distinct tables

make sure 2nd invoke fails for whatever reason
- expected result would be that the transaction (insert) for the 1st invoke
should be rolled-back as well

Solution:

Make sure the DB connection are XA enabled and not MCF.

1. To make Async one way bpel process invocations to participate
in single global transaction, set bpel.xml configurations property
"deliveryPersistPolicy" to "off.immediate" and
2. To force such BPEL processes to throw un-handled BPEL faults
back to invoking process, set bpel.xml configurations property
"handleTopLevelFault" to "false".
To make sure that the all the Async one-way BPEL processes are
participating in single global transaction and all the unhandled BPEL Faults
and exceptions are propagated back to the invoking process, configure the
following in configurations section of bpel.xml:

....
off.immediate
participate
false


Also refer:

http://www.oracle.com/technology/tech/soa/pdf/oracle-soa-suite-xa-rac-guide.pdf

Sunday, August 16, 2009

Increment XSLT Variable

< ?xml version="1.0"?>
< xsl:stylesheet xmlns:xsl="http://www.w3.org/1999/XSL/Transform"
version="1.0">
< xsl:output method="html"/>
< xsl:template match="/">
< xsl:call-template name="incrementValue">
< xsl:with-param name="value">1
< /xsl:call-template>
< /xsl:template>
< xsl:template name="incrementValue">
< xsl:param name="value"/>
< xsl:if test="$value <= 10">
< xsl:value-of select="$value"/>
< xsl:call-template name="incrementValue">
< xsl:with-param name="value" select="$value + 1"/>
< /xsl:call-template>
< /xsl:if>
< /xsl:template>
< /xsl:stylesheet>

Output would be : 12345678910

Tuesday, June 9, 2009

Changing Name Space of element using XSLT

This example shows how to change namespace of elements in XML using XSLT.


http://xmlns.schneider.com/FoundationObjects/B2B/V1


http://xmlns.schneider.com/EnterpriseObjects/EBO/sendPayment/V2


Saturday, April 18, 2009

Friday, April 3, 2009

OSB: XSD Validation and Exception Handling

Thanks Edwin for beautiful post.

In OSB ( Oracle Service Bus , aqualogic service bus ) it is relative easy to add schema validation to your proxy service and to make a custom exception handling for this validation. Just follow the next steps. First in this example I use these xml schema's for the request and response operation.

The request xsd

<xs:schema xmlns="http://www.test.com/request" xs="http://www.w3.org/2001/XMLSchema" targetnamespace="http://www.test.com/request" elementformdefault="qualified" attributeformdefault="unqualified">
<xs:element name="request">
<xs:complextype>
<xs:sequence>
<xs:element name="runid" type="xs:short"/>
<xs:element name="message" type="xs:string" minoccurs="0"/>
</xs:sequence>
</xs:complextype>
</xs:element>
</xs:schema>


And the response xsd


<xs:schema xmlns="http://www.test.com/response" xs="http://www.w3.org/2001/XMLSchema" targetnamespace="http://www.test.com/response" elementformdefault="qualified" attributeformdefault="unqualified">
<xs:element name="response">
<xs:complextype>
<xs:sequence>
<xs:element name="runid" type="xs:short"/>
<xs:element name="message" type="xs:string" minoccurs="0"/>
<xs:element name="errorid" type="xs:string" minOccurs="0"/>
<xs:element name="error" type="xs:anyType" minOccurs="0"/>
</xs:sequence>
</xs:complextype>
</xs:element>
</xs:schema>


When everything goes well I will only return the runid element else we get the full message with the errorcode. With these xsd's I made a simple WSDL which I can use in the proxy service.

First part of this blog entry is to make the happy flow when this works we can add the xsd validation.
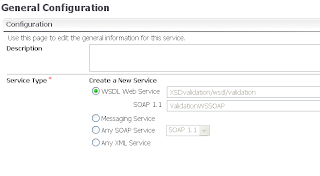
Make a new proxy service and use this WSDL.
The next step is to make a simple business service with file transport
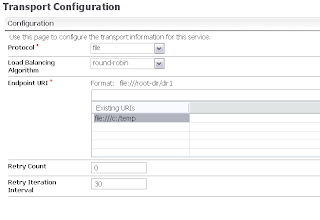
In my case I put the request xml in the c drive temp folder.
Go back to your proxy service where we create a new message flow.
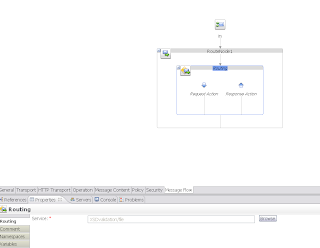
Add a route-node to the flow with inside a new routing. This routing will call the file business service.
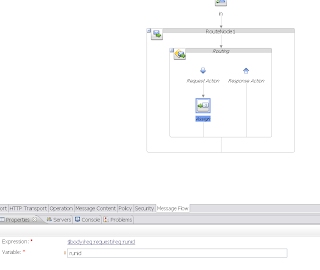
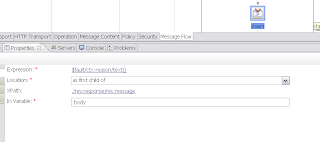
Add an assign component to request action flow so I can retrieve the runid from the request and add this to the runid variable. This variable I can use for the response.
To make a return message I add an assign to the response action.Now I add the response template xml to the body variable.
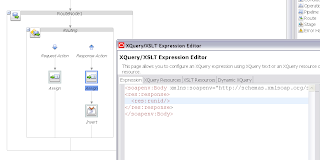
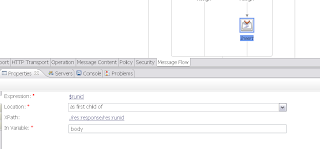
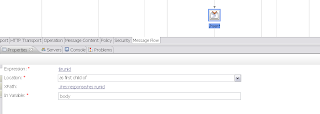
Add an insert to the response action after the assign. In this insert we will add the runid of the request to the runid of the response message.
The first part is finished, you service should work now. In the second part we will add the XSD validation.
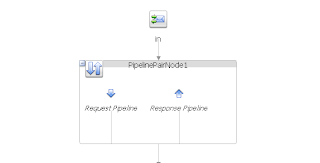
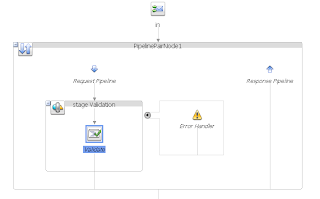
To make a custom exception handling for the xsd we need to add a Pipeline Pair node.
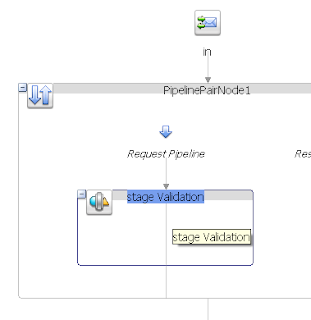
In the request pipeline I will add a new stage.
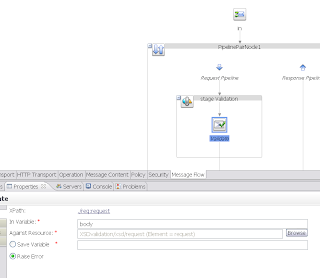
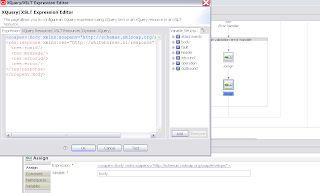
In this stage I use the validation component. Now we have to select an element in the body variable which OSB will validate against the XSD. Provide the XSD and use the raise error option.
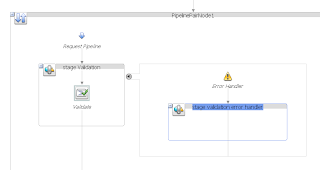
Add an error handler to this stage.
Add a new stage in the error handler

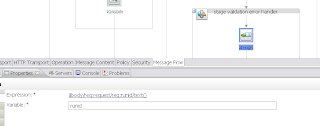
First we add an assign to the stage to retrieve the runid of the request message so I can use this for the response.
Add a second assign to the stage. In this assign I will add the response template xml to the body variable.
Add the runid to the response xml
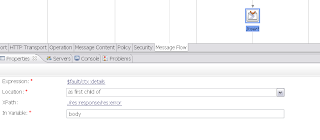
Add the error details to the response xml

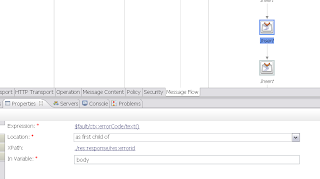
And the error code
With the reply we can give back the response xml back to the client. Very important report no error because this is a handled exception.


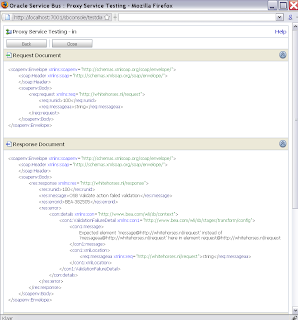
The second part is also finished, we only have to test this proxy service by adding a unknow element to the request and look at the response. Here is a picture of the result.

Monday, March 23, 2009

Oracle Service Bus : Split Join Example

Thanks to Edwin to highlight this feature.

One of the cool features of the OSB is Split-Join feature with this you can split up you service request message and process these parts parallel. This part can be processed in an other service. The results or errors of these parts will be later joined together and send back in the response of the proxy service. In this blog I will use a Web Service which has as input Orders and we will split these orders to one order. Because I don't know how many orders I can receive we need to use a Dynamic Split-Join.

This is the xsd I used

I created a WSDL with operation which has a request and a response based on the xsd above

Create a new Split-Join ( You have to do this from the workshop application) where we select the operation of the just created wsdl
The Split-Join automatically creates two variables.

We have to initialize the response variable by adding an assign action where I add the result element to the response variable. Put this Assign action right after Receive
Now we can add a For Each Flow Control which will handle every Order, Put this after the Assign Action.

Select the For Each component where we can define the parallel mode of the order processing and we have to define the counter variable name which start in my case with 1 and ends with the count of the order elements.
Add a new variable order which is based on the order element. We will copy later one order to this variable.
Add a copy action to the Scope window of the For Each component where we use the counter variable to get the right order and pass this value to the order variable. (
$request.parameters/def:Orders/def:Order[$counter] )
Let's change the status of a order by adding a new copy action. Normally you will call an external service which processes the order and returns the result.
Now we collect the result of an order and this to the right place in the responce variable.
A Split-Join can only be called from a business service so let's create one automatically.


This business can be called by a proxy service. Create a proxy service based on the same WSDL as the split-join.
Add some routing to this proxy so the split-join business service is called from this proxy service
Publish this project to the ESB where we can test the proxy service. OSB automatically generates a example orders xml where we will add an extra order.
And voila here is the response where the status element value of the orders are changed to processed.

FEEDJIT Live Traffic Map

My Blog List